Print Options:

Easy Bread and Butter Pickles

easy bread and butter pickles

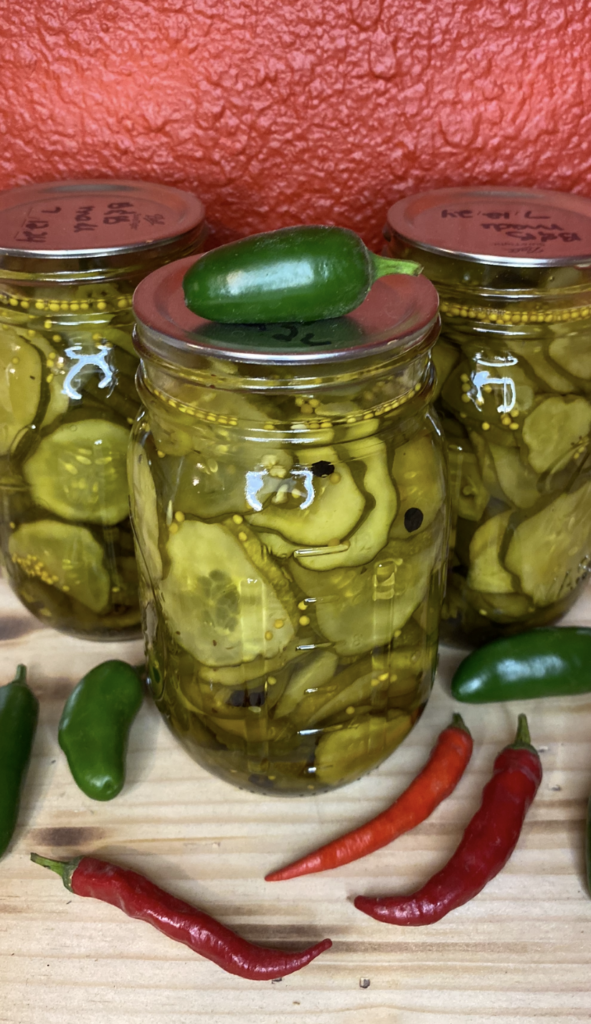
This easy bread and butter pickles recipe is sweet, crisp, easy to make, and can add a crunch of deliciousness to a whole lot of different foods such as a burger, sandwich, tuna, or add them into things like this potato salad. This recipe is for refrigerator pickles.

I had an over load of cucumbers from the garden this year, so naturally I made these easy bread and butter pickles with them. I made about 20 pint sized mason jars through out this past growing season!

There's nothing like homemade pickles, especially if you can grow your own cucumbers. If you can't I would recommend grabbing some from your local farmer's market. There's a sense of excitement and accomplishment when you pull your own food from the refrigerator or cabinet.

YOU did that! Not some big million dollar company, that only care's about the profit, and not what's really in your food.

Bread and butter pickles are my favorite! These are incredibly easy to make. It does take some time to let the cucumbers soak, but you'll have fresh, homemade pickles in your refrigerator.

Ingredients

  • Cucumbers
  • Onions
  • Red Bell Pepper
  • 2 Cloves of Garlic
  • Jalapenos (optional)
  • Canning Salt
  • Apple Cider Vinegar
  • Water
  • Sugar
  • Turmeric
  • Celery Seed
  • Peppercorn
  • Mustard Seed
  • Pickle Crisp

Directions

  • Once you have your cucumbers, you'll slice them either in discs or into spears. Then you'll place them in a large bowl, sprinkle with about 2-3 tablespoons of canning salt. Using canning salt is important because regular table salt can make your brine cloudy. This will ensure a clear brine, and a beautiful looking jar when finished.
  • Cover it, and place into the refrigerator for about 3 hours.
  • Once your time is up, there will be water in the bottom of the bowl. Drain into a colander, and rinse the cucumbers well. This step is neccessary to remove excess moisture from the cucumber so it stays nice and crispy and doesn't become soggy.
  • Sterilize your pint size jars and lids that you will be using. You can do this by washing in hot soapy water, and placing them onto a clean dish cloth to dry.
  • Proceed to chop the onion and red bell pepper and any other veggie you decide to throw in. Leave the garlic whole.
  • In a medium pot, bring water, vinegar, sugar, celery seed, and turmeric to a boil. This will be your brine. The turmeric acts as your coloring. You will not taste it, but will give your finished jar that classic bread and butter pickle look.
  • In the bottom of your clean, dry jars, place 1/8th tsp of pickle crisp in each. Also add 1 teaspoon of mustard seed and 1 tablespoon of peppercorn to each jar. Measure with your heart here. The pickle crisp needs to be precise, but the mustard seed and peppercorns can be as desired.
  • Pack each jar full of your chopped veggies and cucumber slices.
  • Once your brine has come to a boil, carefully fill each jar until there is about a 1/2 inch of head space left.
  • Release the air bubbles with a bubble popper or headspace measurer, or something that is non-reactive (nothing metal or steel as that will react with the vinegar). This is a common tool used in the practice of canning, and can be found with a simple Google search.
  • Wipe the rim of the jar clean, and place lids on top. Screw finger tight.
  • Let the jars sit on the counter, out of direct sunlight, until they have cooled.
  • Once cool to the touch, place your freshly made bread and butter pickles into the refrigerator.
  • I would recommend letting them sit for at least a week minimum before digging in. This is truly the hardest part. Who doesn't want to immediately try what they have just created? But this step is important to let the pickles develop their flavor. The longer you can let them set, the better they will taste.

These will be good for about 3 months in the refrigerator (if they last that long!)

Signs of spoilage include visible mold, an unusually sour taste or smell, off colors or textures, a bulging jar, a domed or bubbled top on the lid, or fizzy pickle juice. If this happens, throw them out, and do not consume them.

Serve and enjoy!!

I would love to hear about your favorite way to make pickles, or even pick your side in the great debate of dill pickles or bread and butter pickles! Also I would love to hear your thoughts on what you like to add in. Do you like jalapeno's in there, or do you add something totally unique?

From my kitchen to yours, have a blessed day!

Cuisine
Courses
Difficulty Beginner
Time
Prep Time: 4 hrs Cook Time: 10 mins Total Time: 4 hrs 10 mins
Best Season Summer, Suitable throughout the year
Description

These pickles are sweet, crisp, easy to make, and can add a crunch of delicousness to a whole lot of different foods.

Ingredients
  • 2 pounds Cucumbers, sliced into rounds or spears
  • 1 Onion, thinly sliced (aka julienne slice)
  • 1 Red Bell Pepper, thinly sliced or diced
  • 3 Jalapenos, sliced into rounds (optional)
  • 2 Garlic Cloves, peeled (Leave whole)
  • 3 cups Apple Cider Vinegar
  • 2 cups Sugar
  • 1 cup Water
  • 3/4 tsp Turmeric
  • 1/2 tsp Celery Seed
  • 2 tsp Mustard Seed (divided)
  • 2 tbsp Whole Peppercorn (divided)
Instructions
  1. After washing and slicing your cucumbers, place in a large bowl. Sprinkle in salt and toss to mix in the salt as evenly possible.

    Set in the refrigerator for at least 3 hours.

  2. Strain and rinse cucumbers well. Set aside.

  3. Bring vinegar, sugar, water, turmeric, and celery seed to a boil.

  4. While waiting on your brine to boil, in each jar place 1/8th teaspoon of pickle crisp, 1 teaspoon mustard seed, 1 tablespoon whole peppercorn, and 1 whole garlic clove.

  5. Pack jars full with cucumbers, onion, red bell pepper, and jalapenos if using.

  6. Once your brine reaches a rapid boil, carefully fill each jar full until there is a 1/2 inch of headspace left.

  7. Use a bubble popper or headspace measurer to release any air bubbles that are present.

  8. Wipe rims clean, and place on your lids finger tight.

  9. Allow to cool on the counter, out of direct sunlight.

    Once cool to the touch, place in the refrigerator and let sit for at least 1 week before serving.

Keywords: Easy to make, sweet, crisp, bread and butter pickles, Homemeade, refrigerator pickles,
Samantha Doe
Food and Lifestyle Blogger

Hi, I'm Samantha, a full-time food blogger, mother of 2 beautiful daughters and a lovely wife. I live in New Jersey with my family. Loves traveling, sharing new recipes, and spending time with my family.